
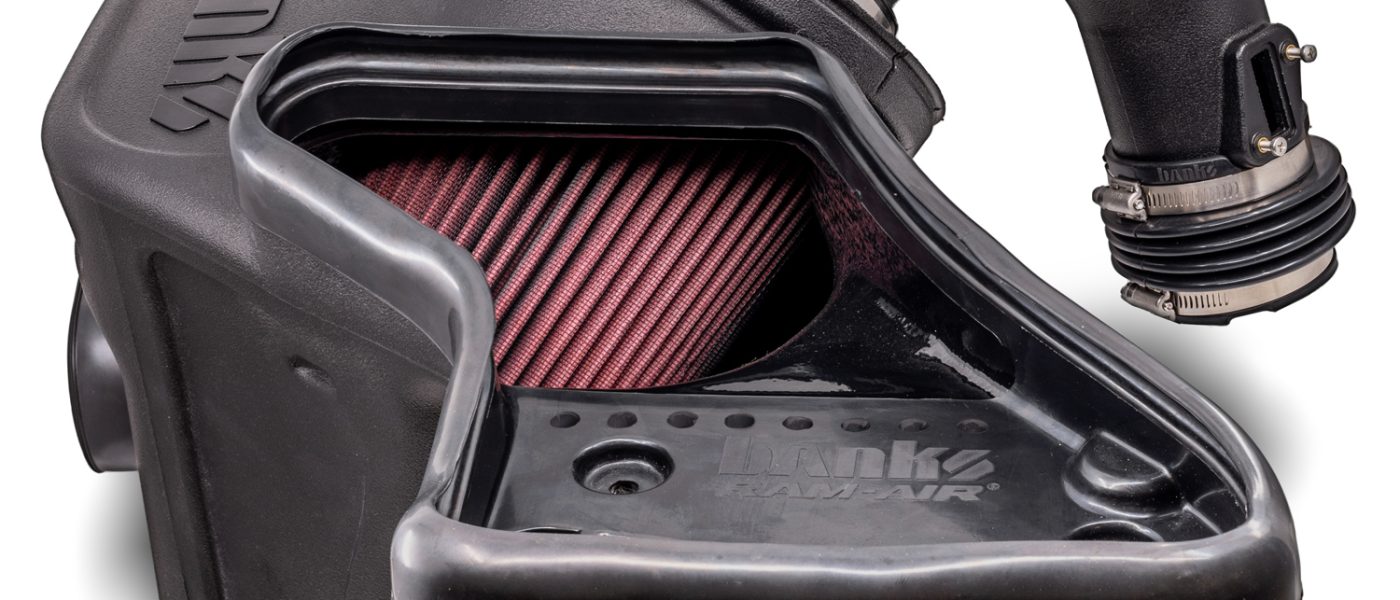
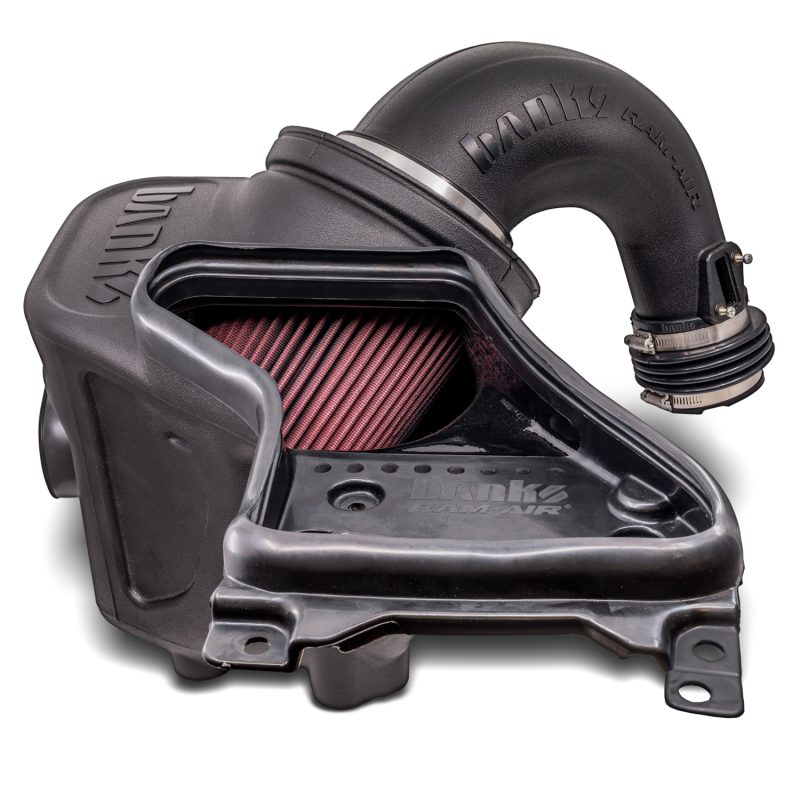
97769 | Banks Ram-Air Intake for 2024-2026 Toyota Tacoma & 2025-2026 4Runner
INSTALL INSTRUCTIONS
Part #s
42291 & 42291-D
Banks Ram-Air® Intake System
2024-2026 Toyota Tacoma 2.4L
2024-2026 Toyota Tacoma 2.4L Hybrid (excluding TRD Pro and Trailhunter)
2025-2026 Toyota 4Runner 2.4L
Please read through the following instructions thoroughly before starting your installation. If you have any questions please visit our Support Page.
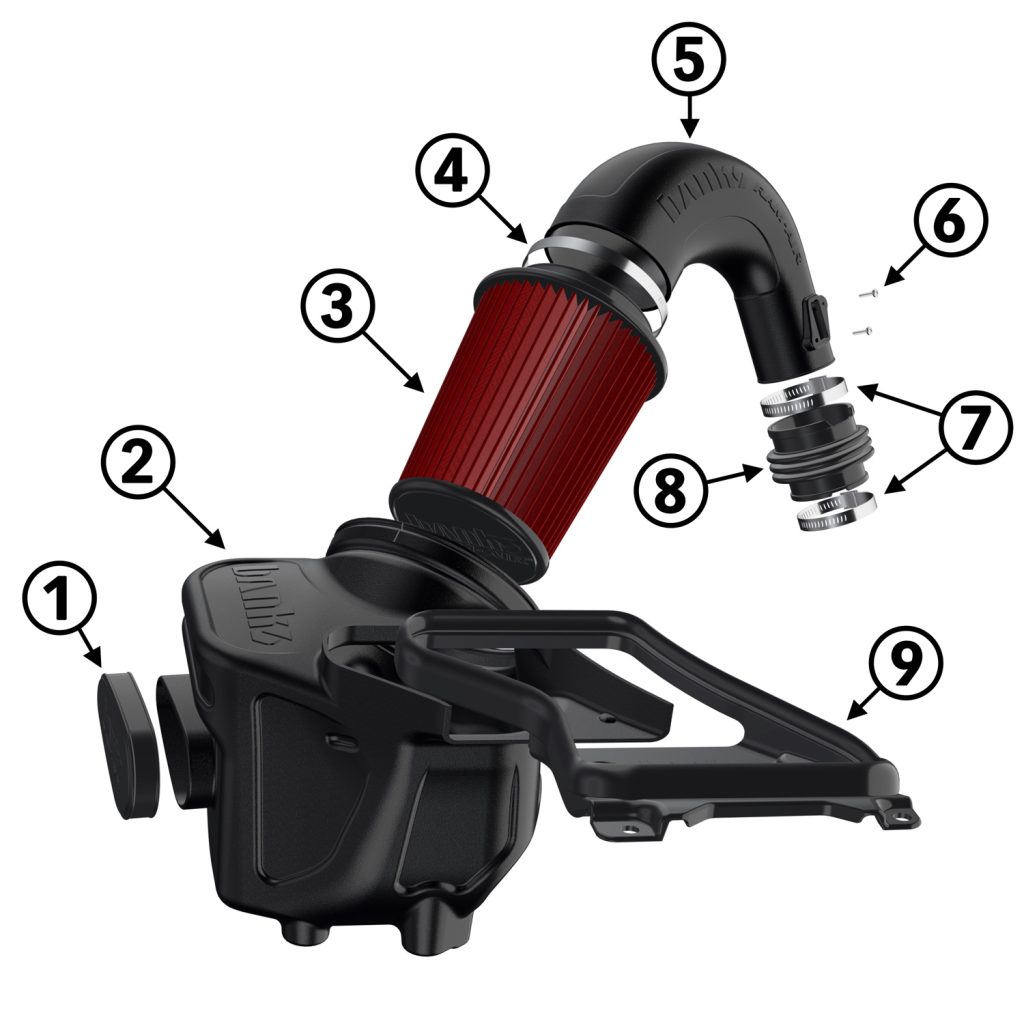
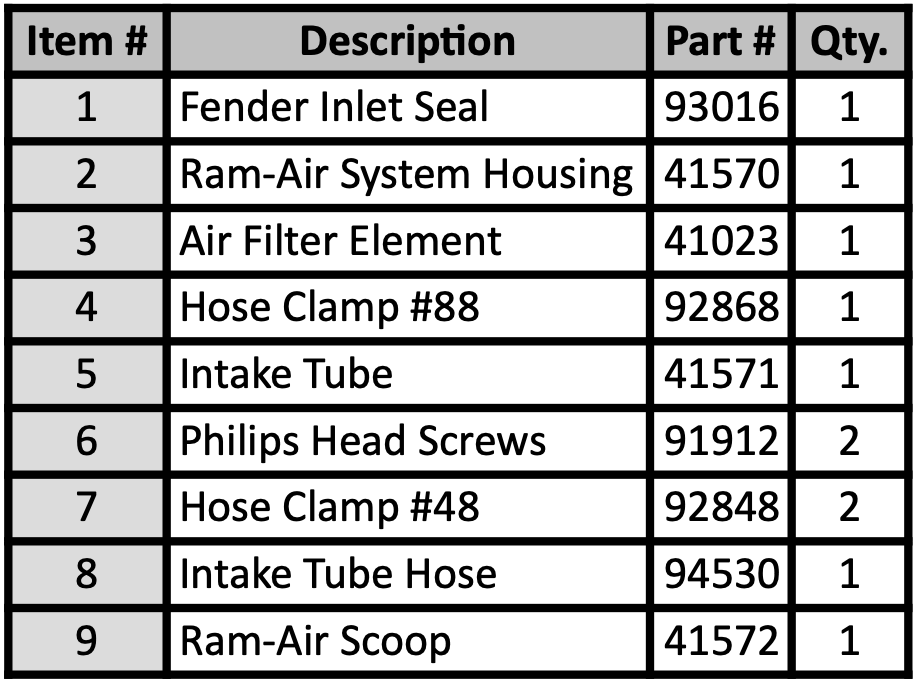
Bill of Materials
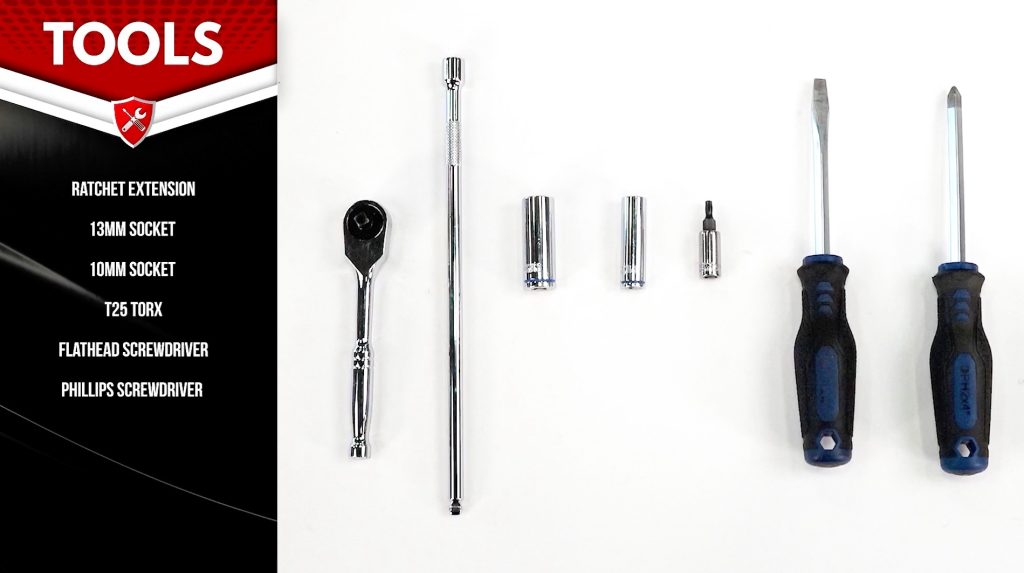
General Installation Practices

Stock Hot Side Removal
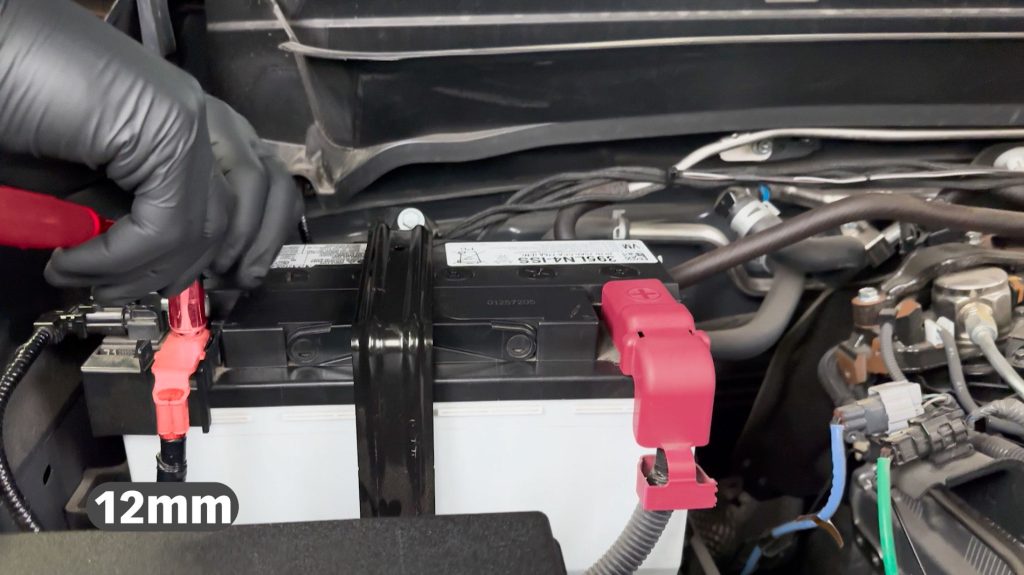
1. With a 12mm socket, remove the negative lead from the battery.
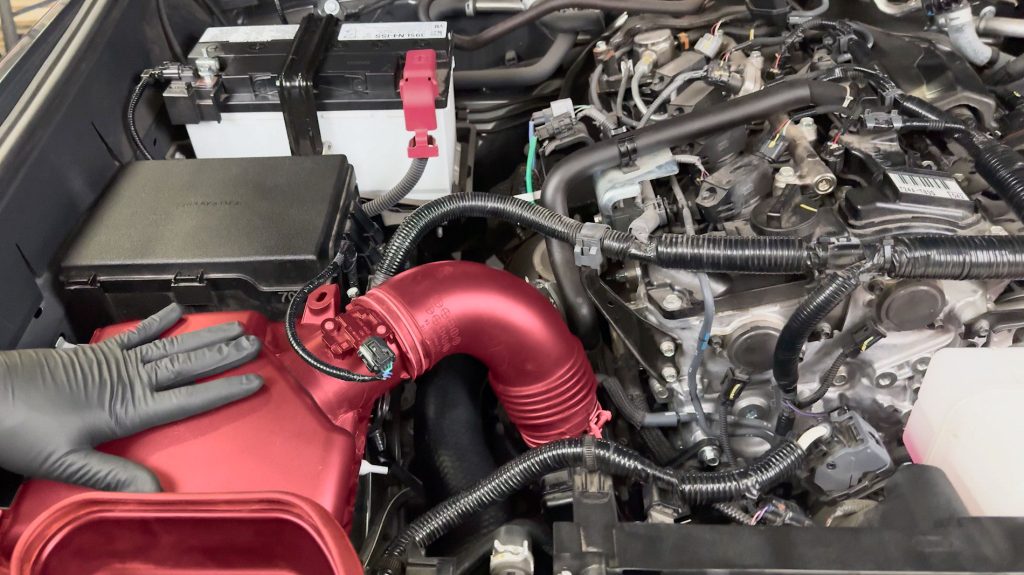
2. Next, locate the airbox.
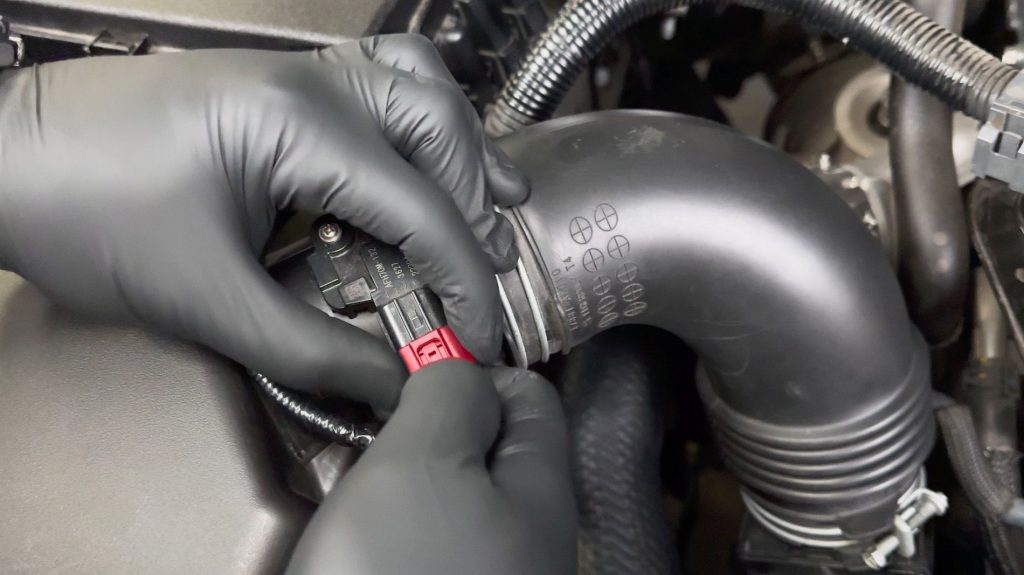
3. Unplug the Mass Air Flow sensor.
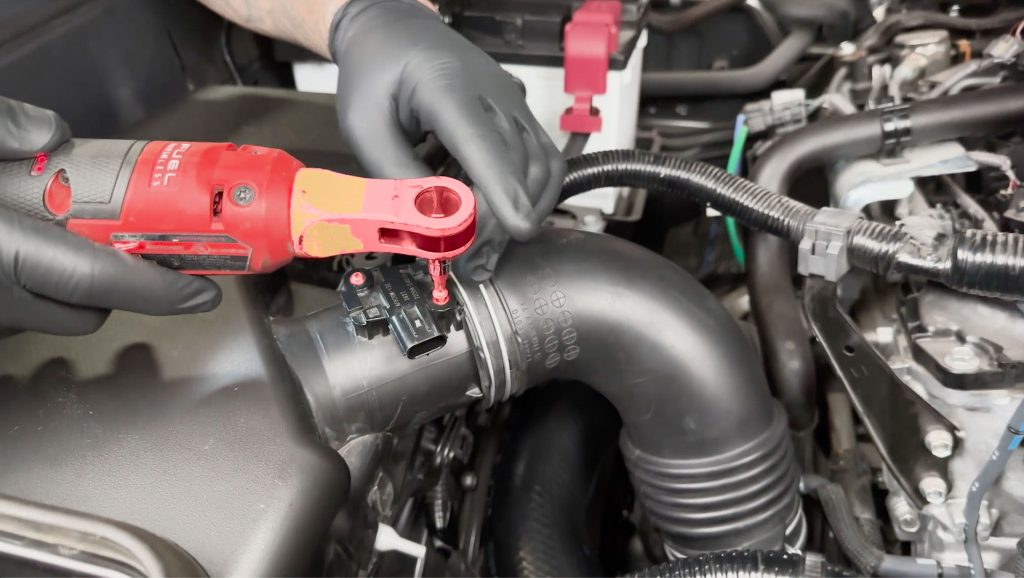
4. Remove the two screws holding the MAF sensor in place. Set the MAF sensor aside for now; it will be transferred to the Banks Ram-Air.
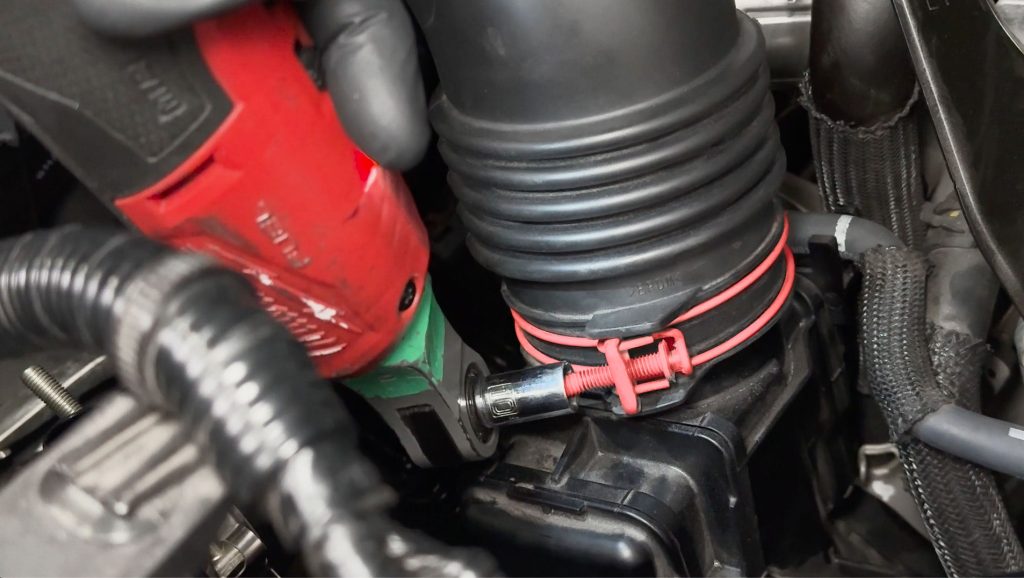
5. With a 10mm socket, loosen the clamp between the airbox and the resonated turbo inlet.
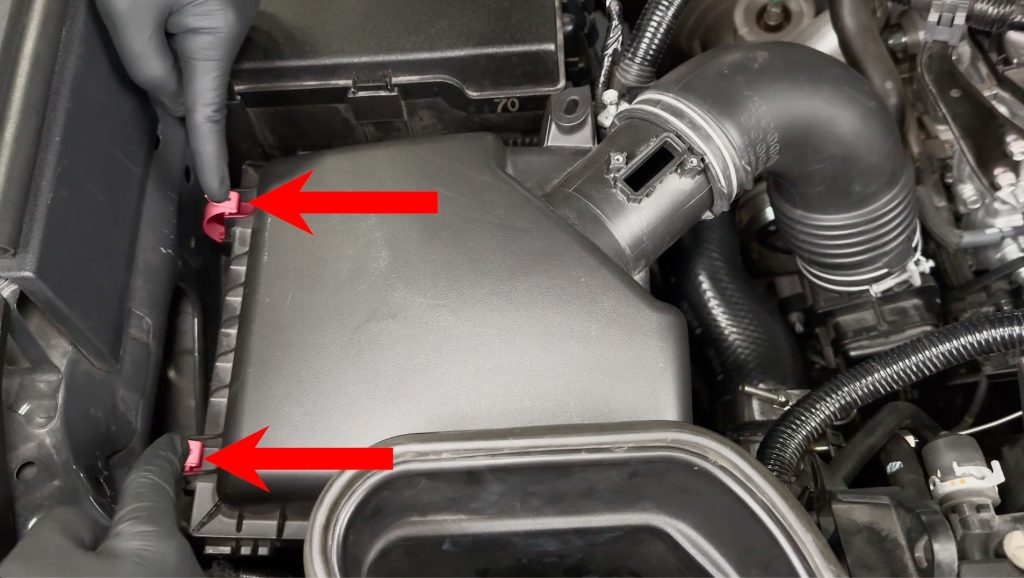
6. Pop these two clips free.
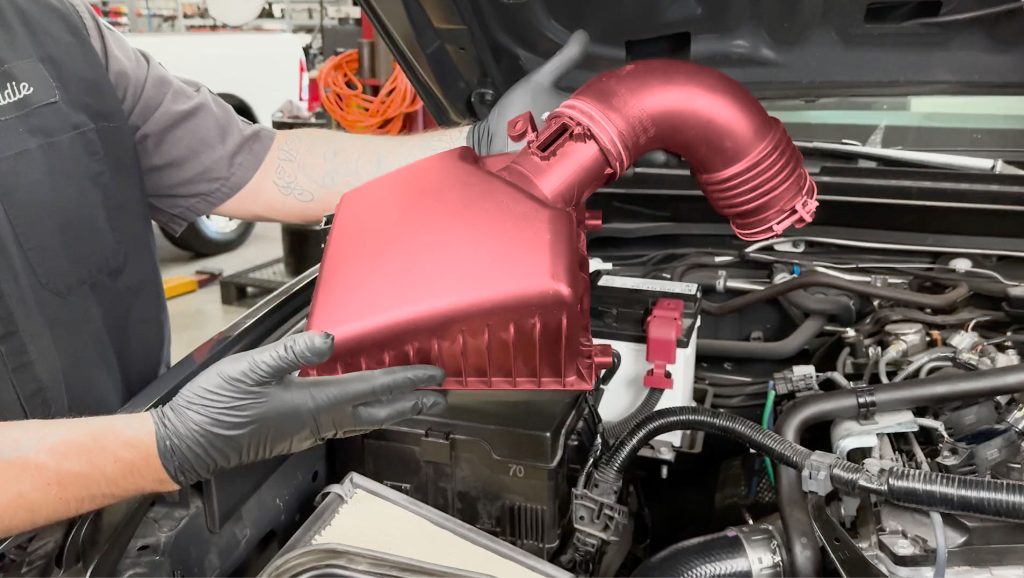
7. Lift the airbox lid and tube up and out of the engine bay.
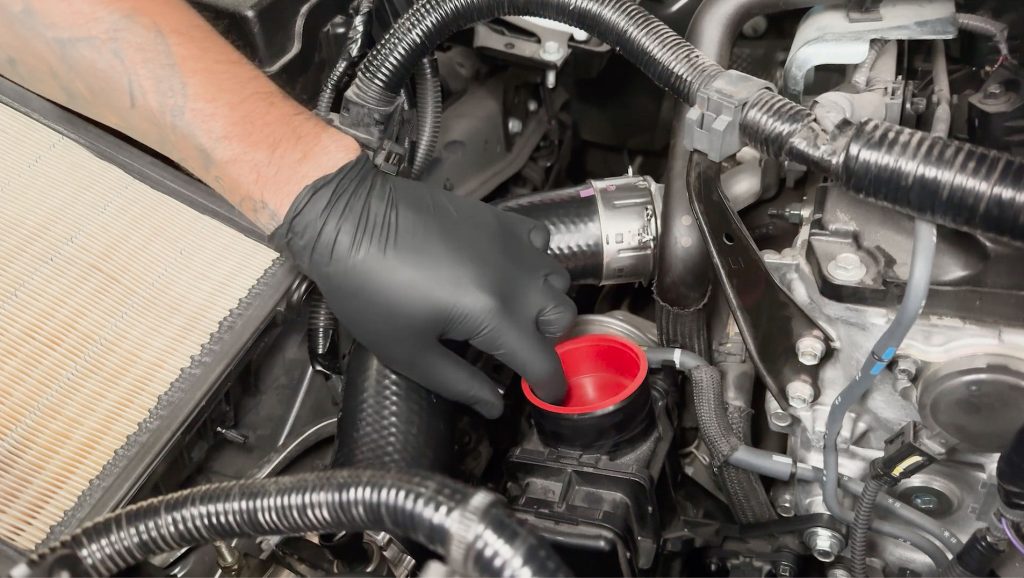
With a rag or plug, cover the resonated turbo inlet to prevent any debris from entering.
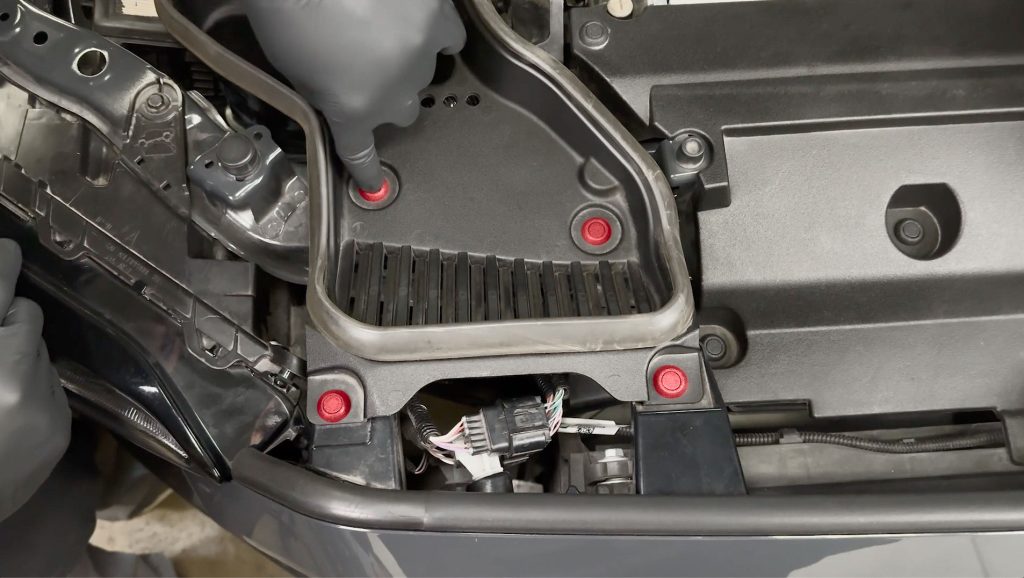
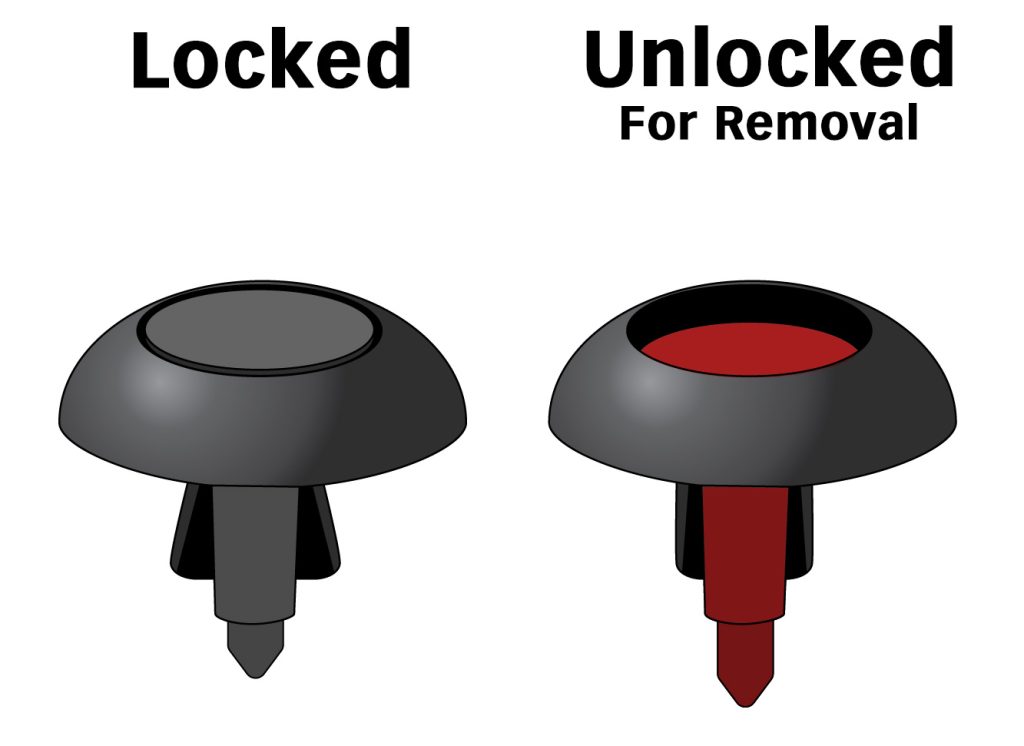
8. Press the center of the 4 plastic tabs in to unlock them, then lift the OEM scoop up and out of the engine bay.
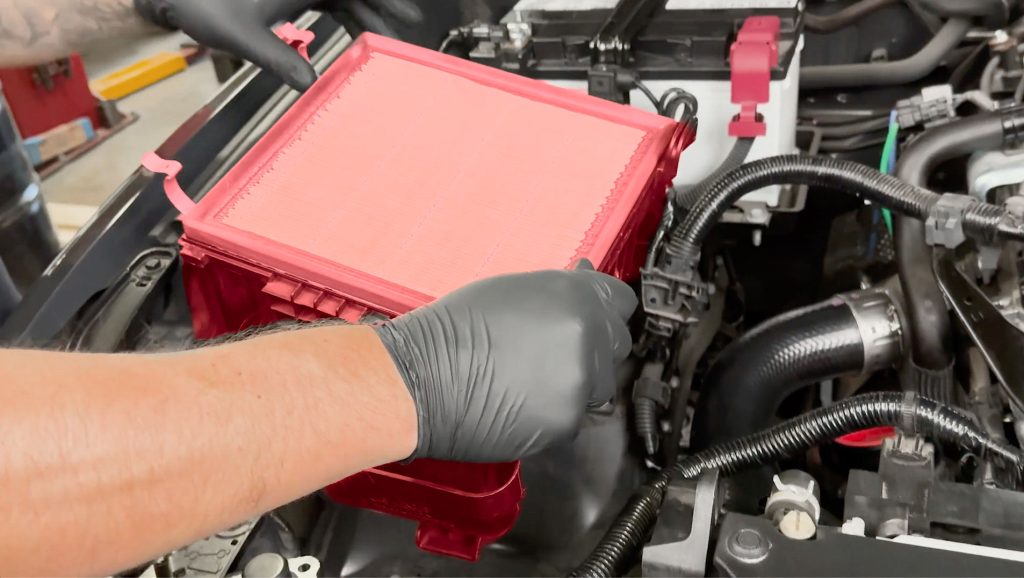
9. Then lift the lower half of the airbox up and out of the truck. It is held in place by 3 rubber grommets.
Banks Ram-Air Intake Prep
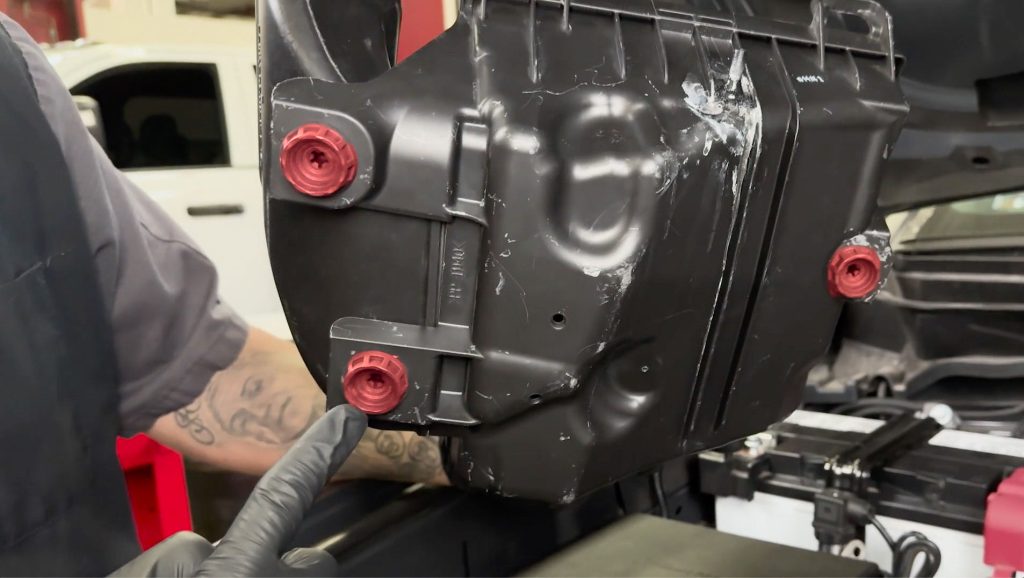
1. Take note of the 3 rubber grommets on the underside of the OEM airbox…
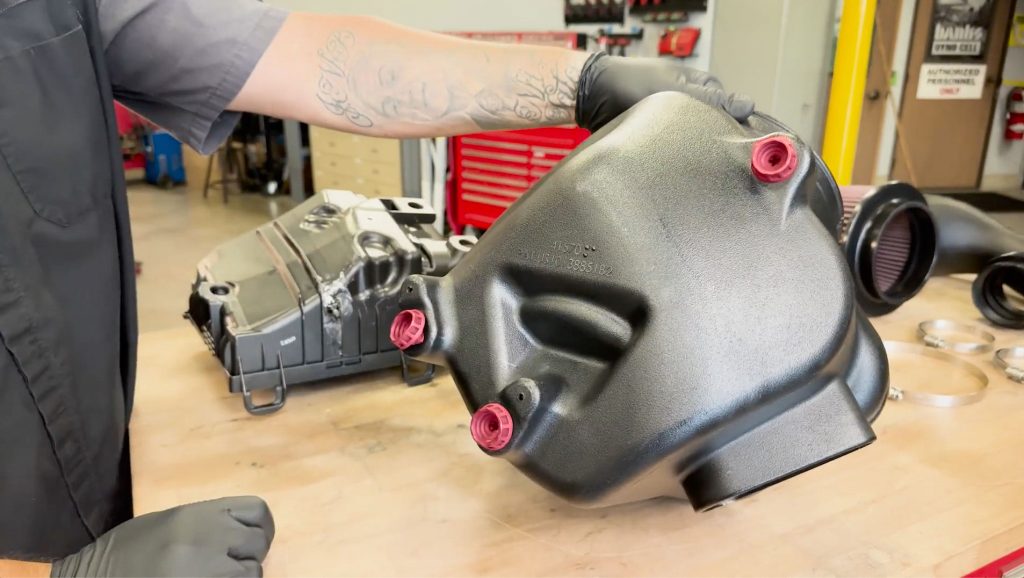
…transfer them to the Banks Ram-Air Housing.
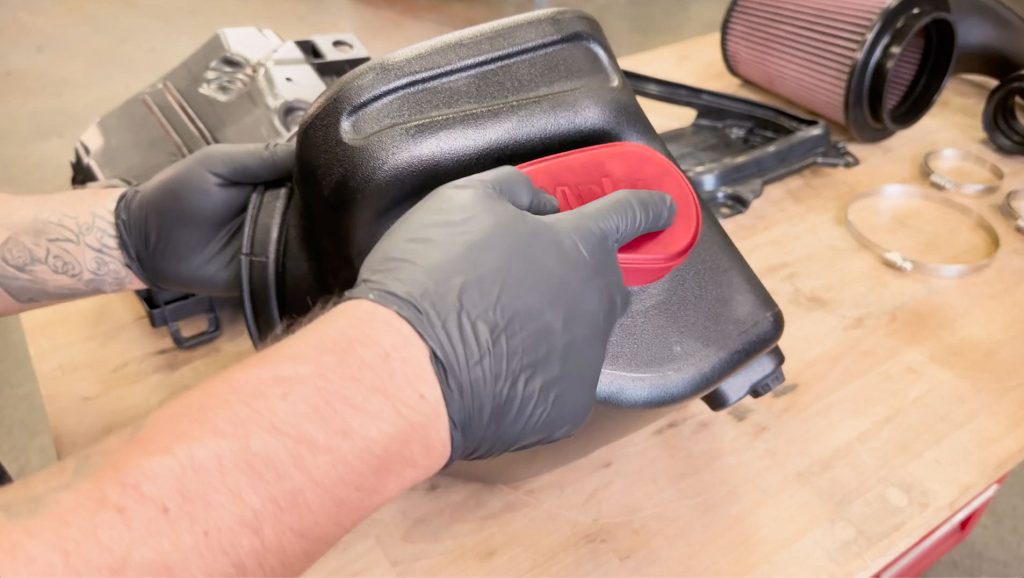
2. Install the side fender plug. Remove only if connecting a TRD snorkel.
Note: Toyota Tacoma vs 4Runner Installation
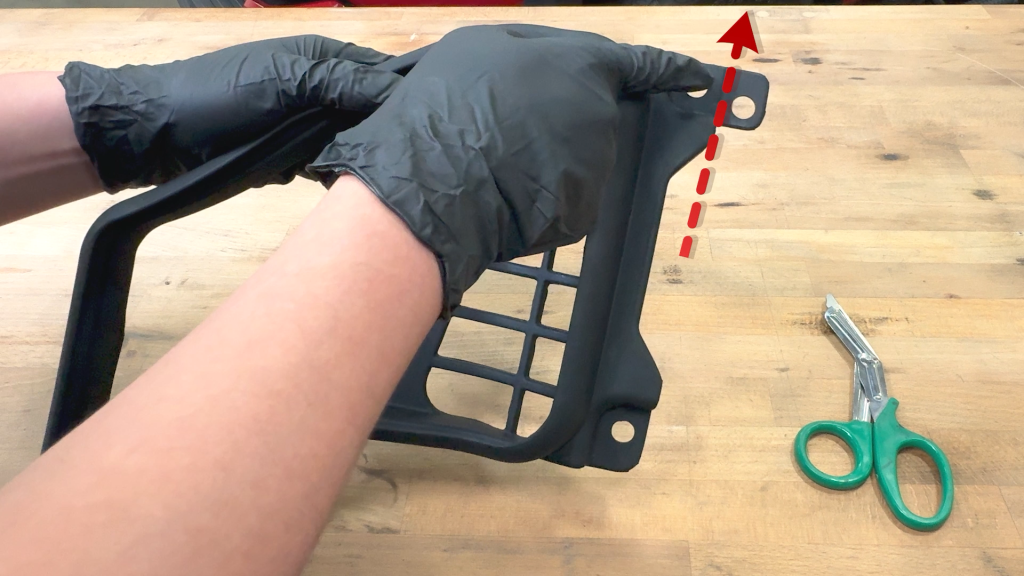
When installing the Ram-Air intake on a Tacoma, you will cut the Ram-Air Scoop at the indentation.
For 4Runner installs, leave this piece intact as the scoop will mount using the further hole.
Banks Ram-Air Intake Installation
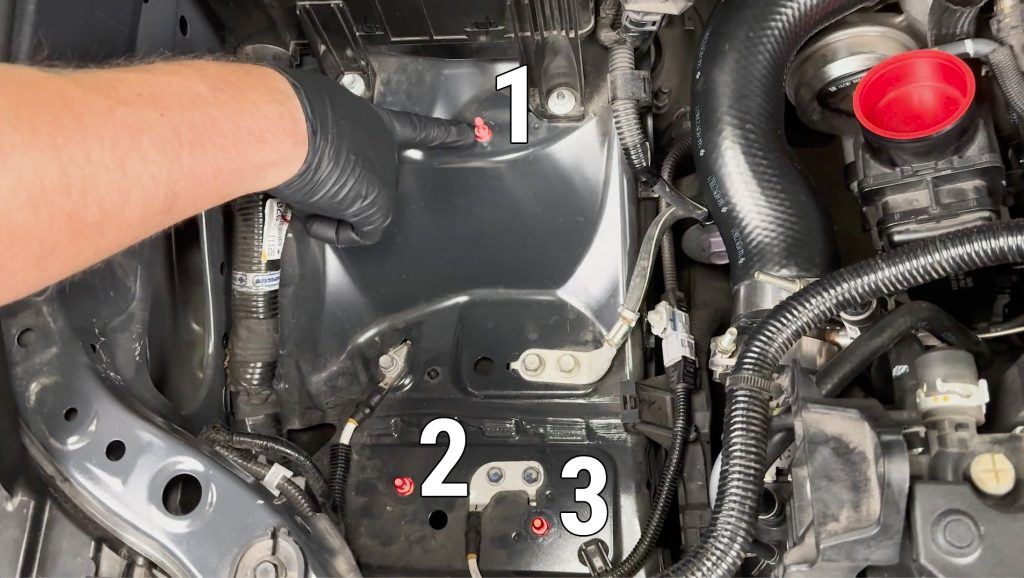
1. Take note of the 3 posts that air box grommets will seat onto.
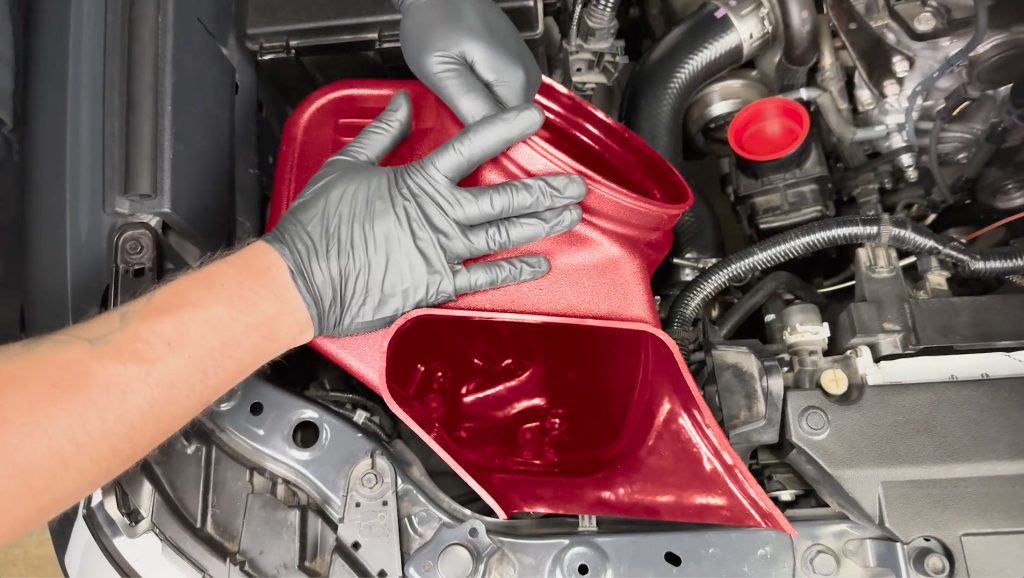
2. Press the Banks Ram-Air Housing down and onto the 3 posts.
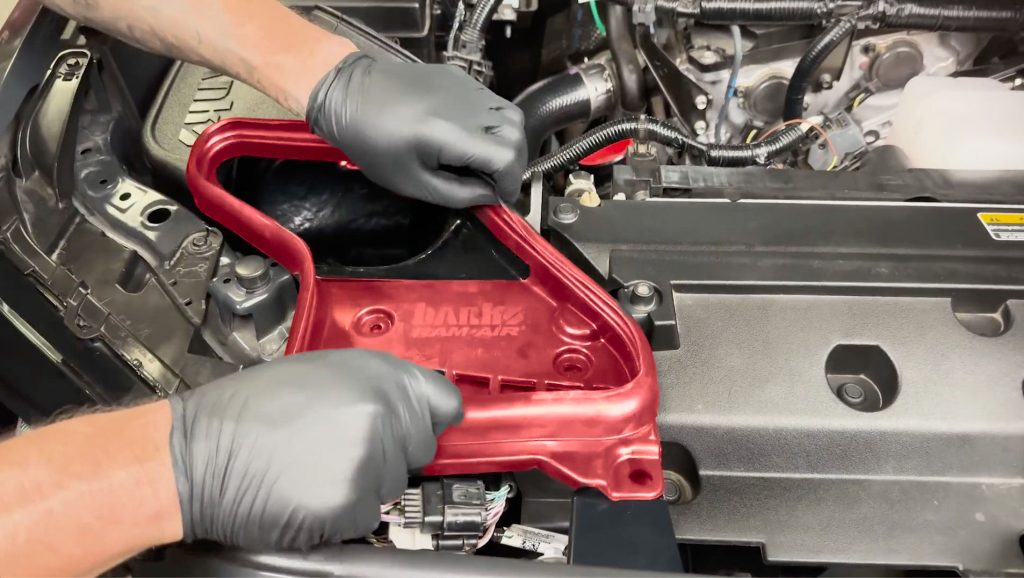
3. Install the Banks Ram-Air Scoop
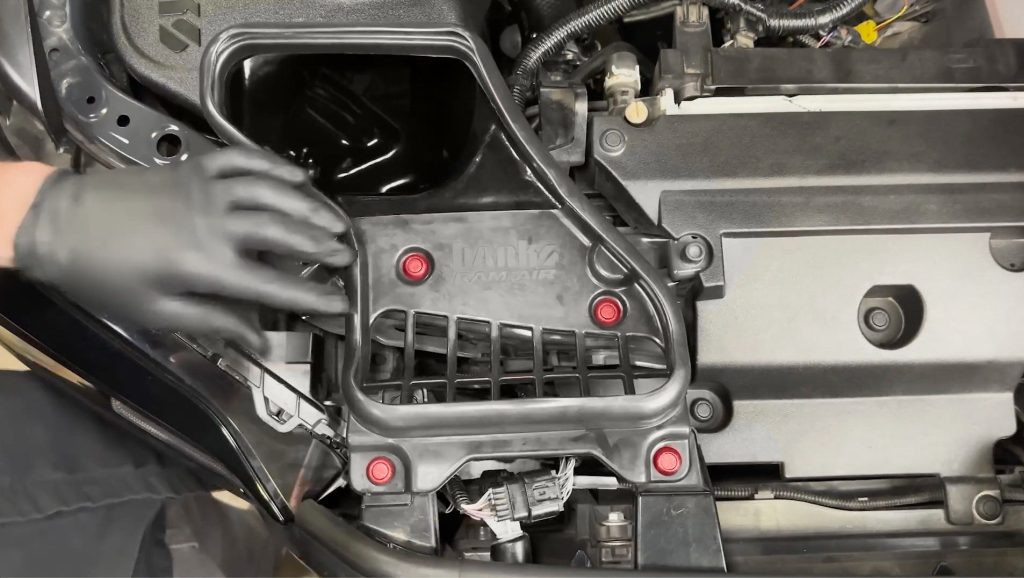
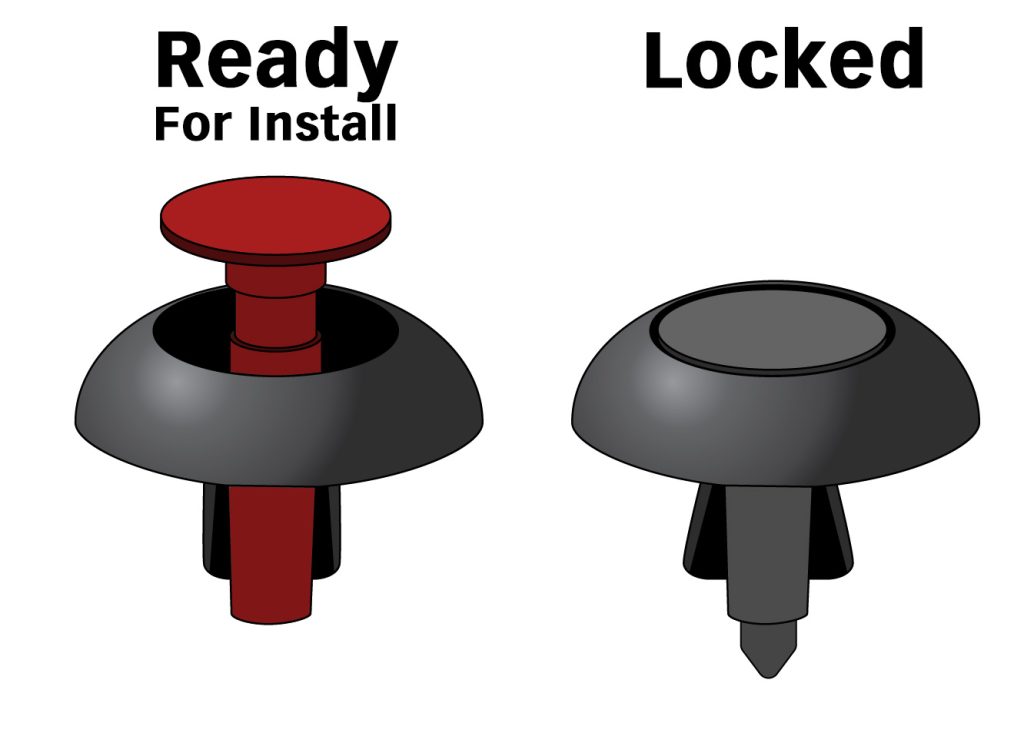
4. Set the 4 plastic tabs to their Ready position, with the center portion raised. Once they are inserted, lock them in place.
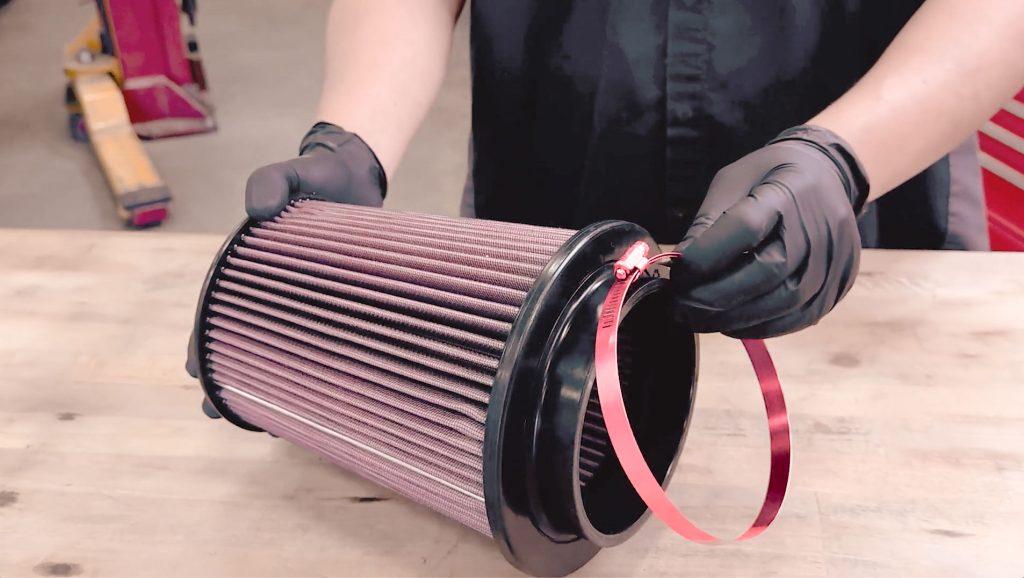
5. Put the #88 Hose Clamp onto the Banks Ram-Air Filter. Leave it loose for now.
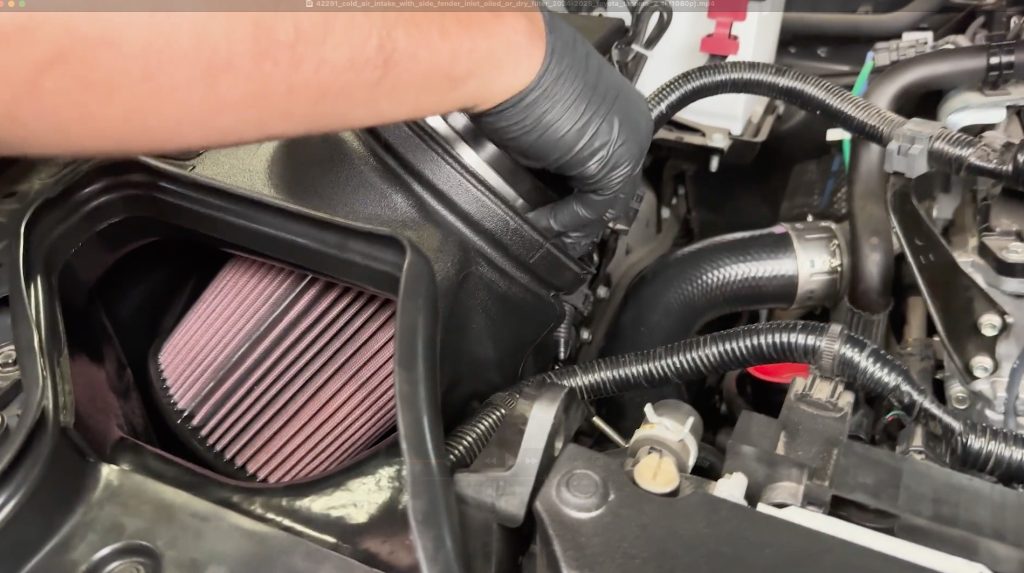
6. Slide the Ram-Air filter and clamp into the Banks Ram-Air Housing.
Below is a detailed explanation of how to properly install and seat the Ram-Air filter.
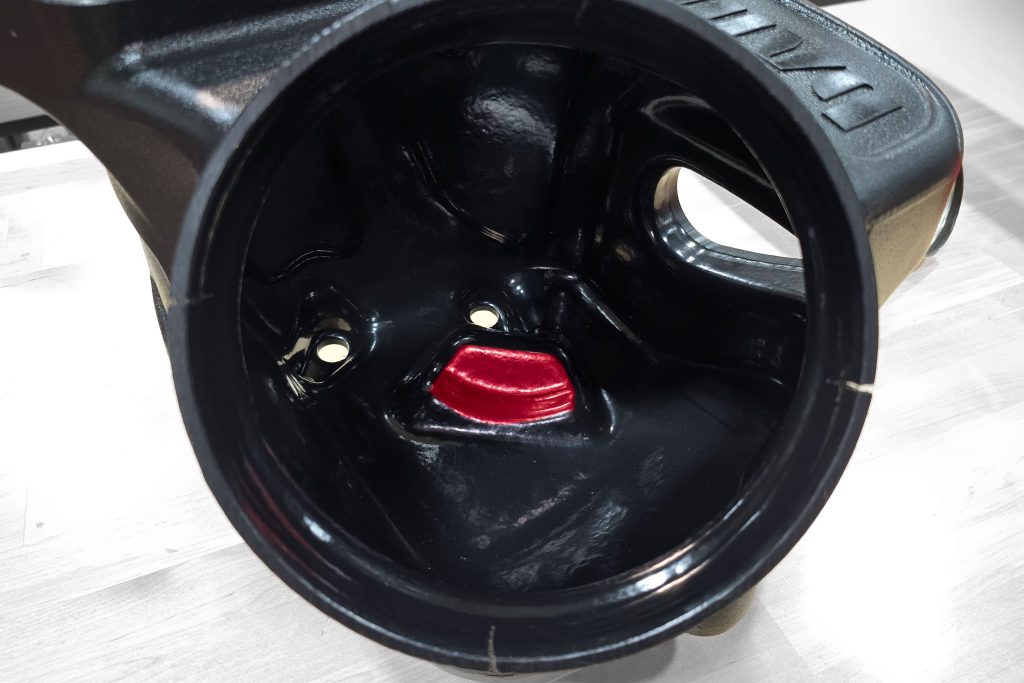
6A. Inside the filter housing, there is a triangular support that the filter will rest on to prevent vibration.
If the filter is not inserted correctly, the filter could get hung up on this feature and prevent insertion.
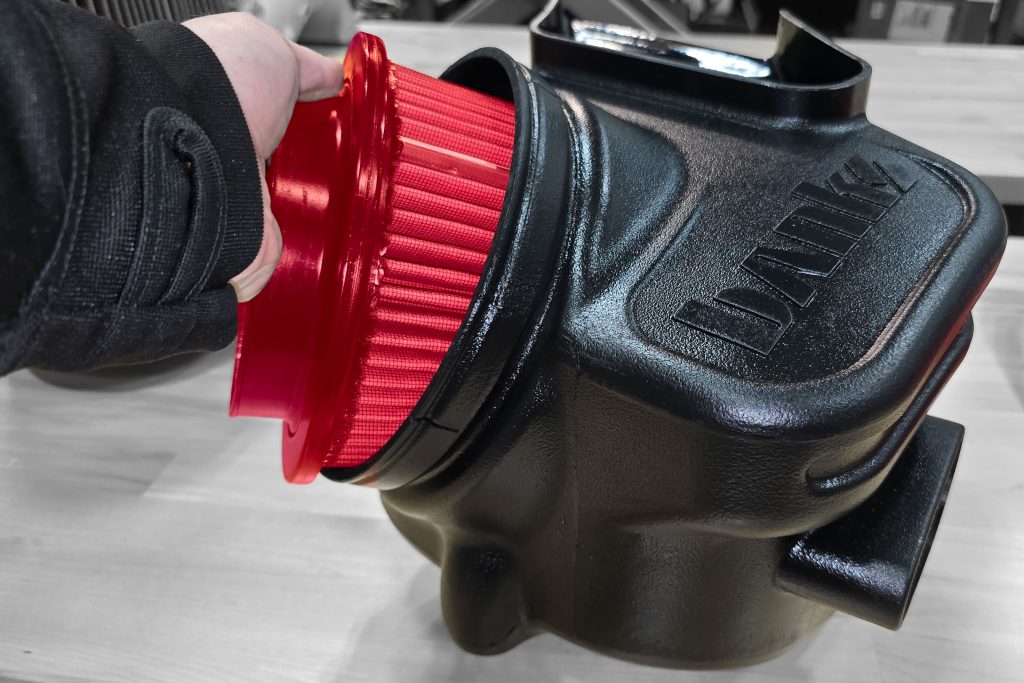
6B. Insert the filter so the bottom lip is inserted first.
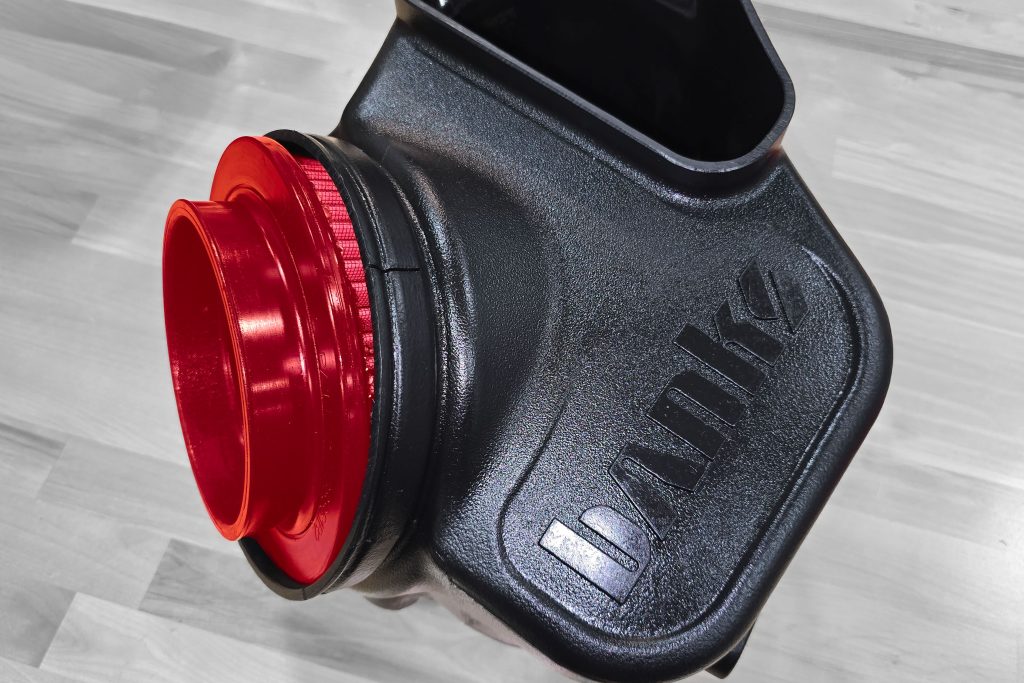
6C. The filter orientation should look like this.
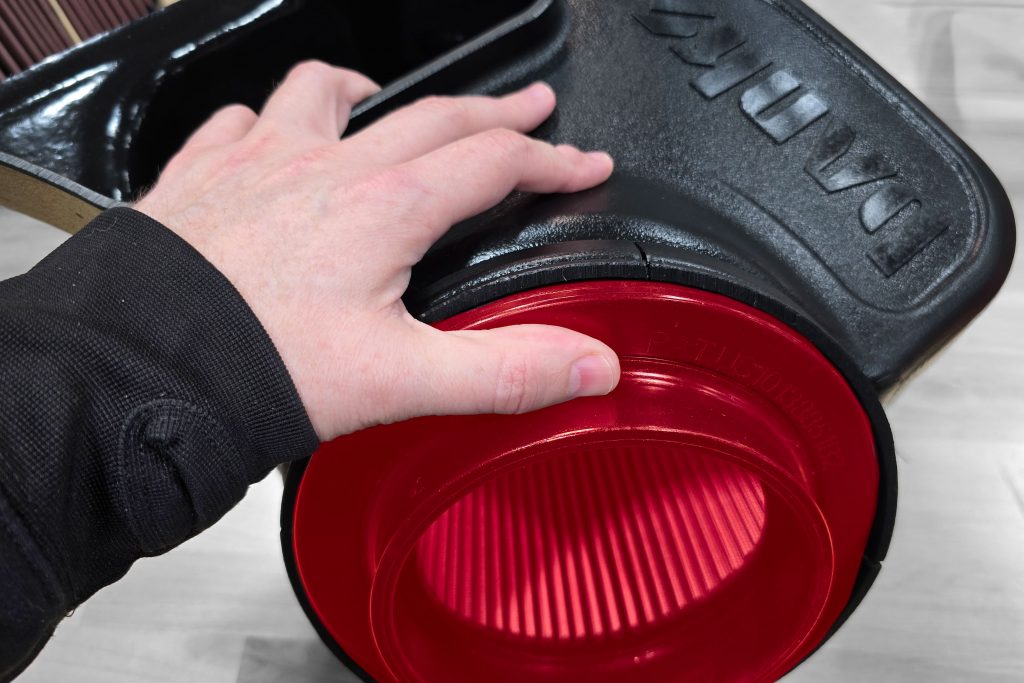
6D. Using your hands positioned on the top and bottom, firmly press the top of the filter in while holding the bottom in place with the other hand.
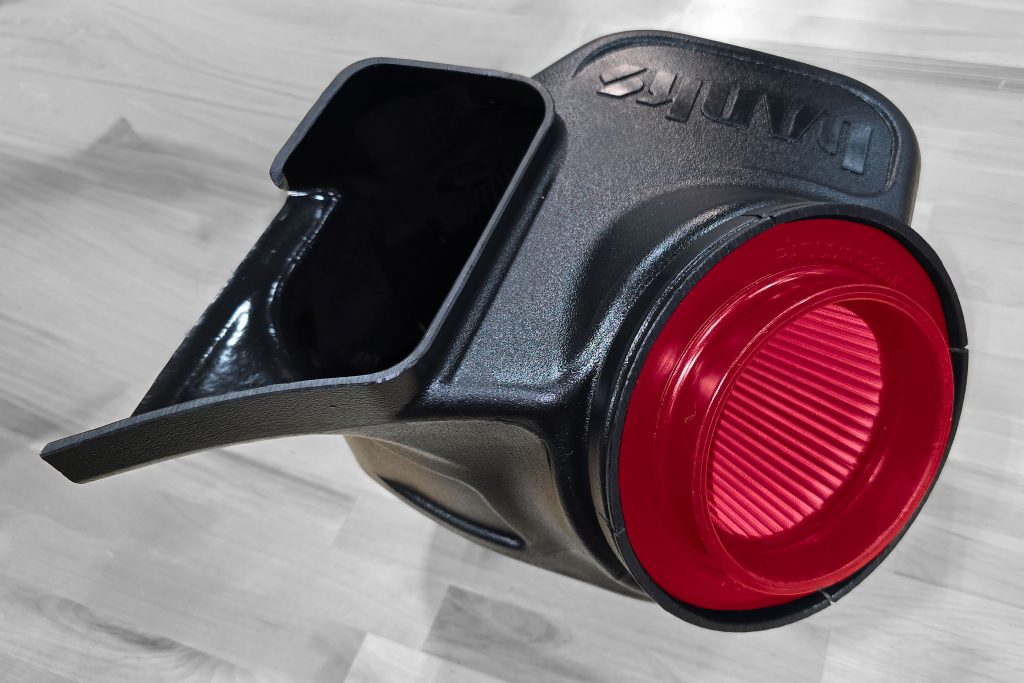
6E. When completed, the filter placement should look like this.
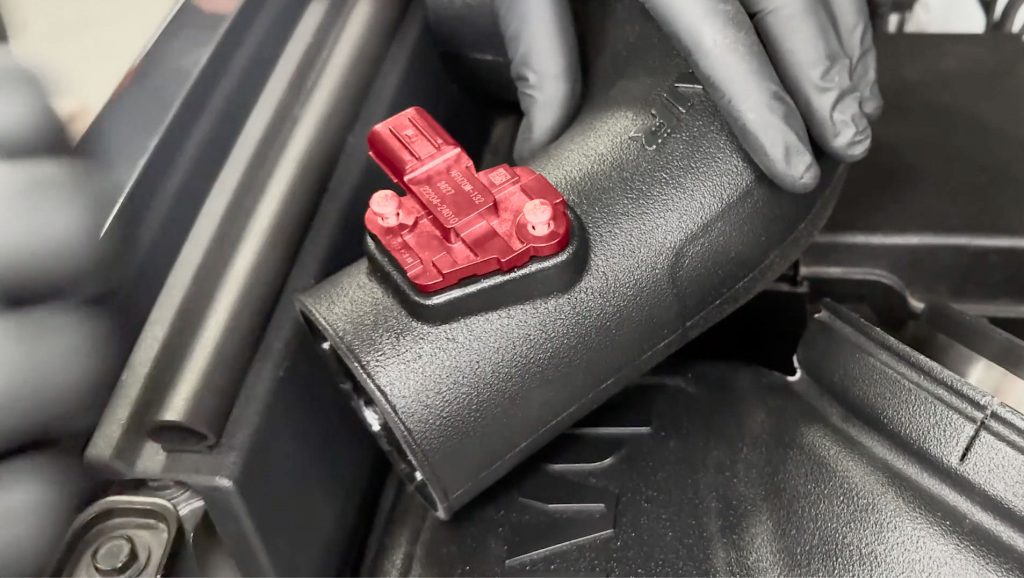
7. Transfer the Mass Air Flow sensor onto the Banks intake tube.
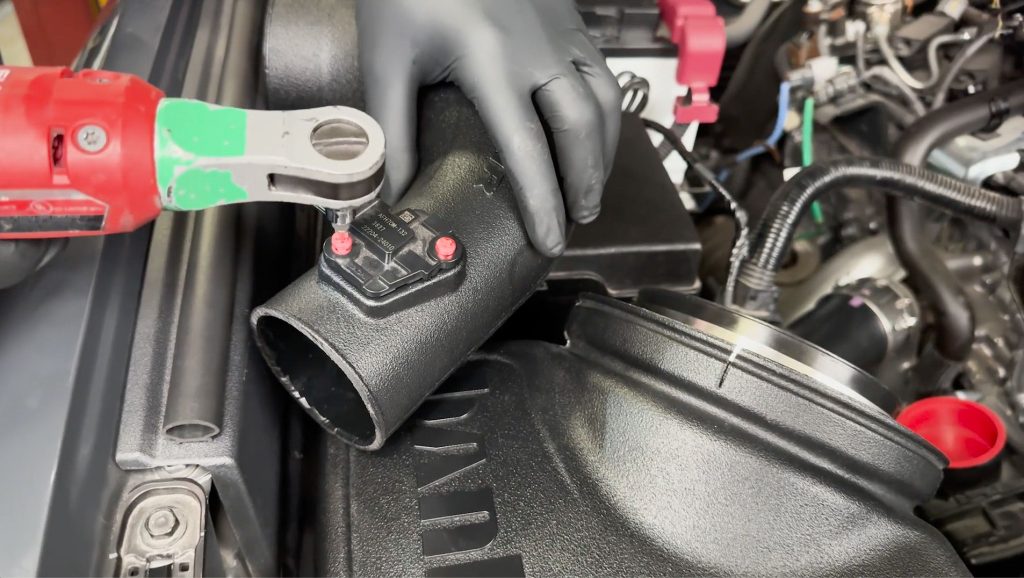
8. With a screw driver, secure it to the intake tube.
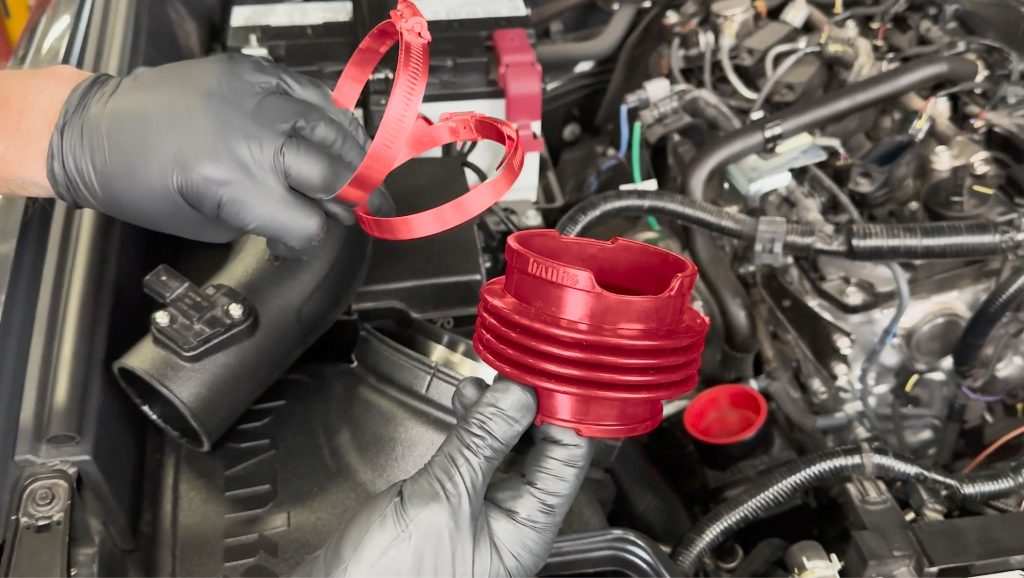
9. Grab the two smaller #48 hose clamps and the bellowed hose.
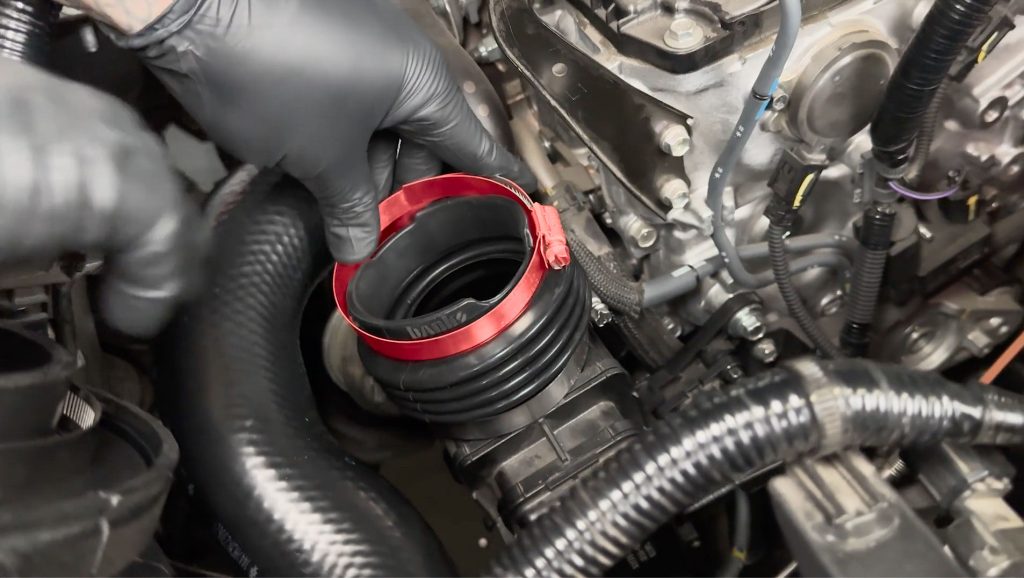
10. Place a #48 hose clamp on each side of the bellowed hose. With the Banks logo facing up, install it onto the resonated turbo inlet.
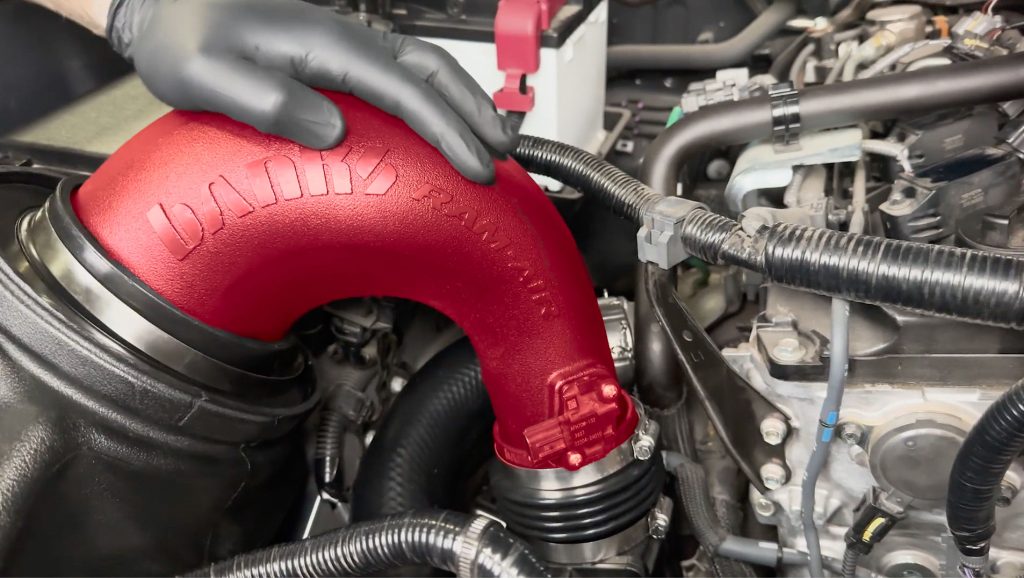
11. Install the Banks Ram-Air Tube into the Air Filter & bellowed hose.
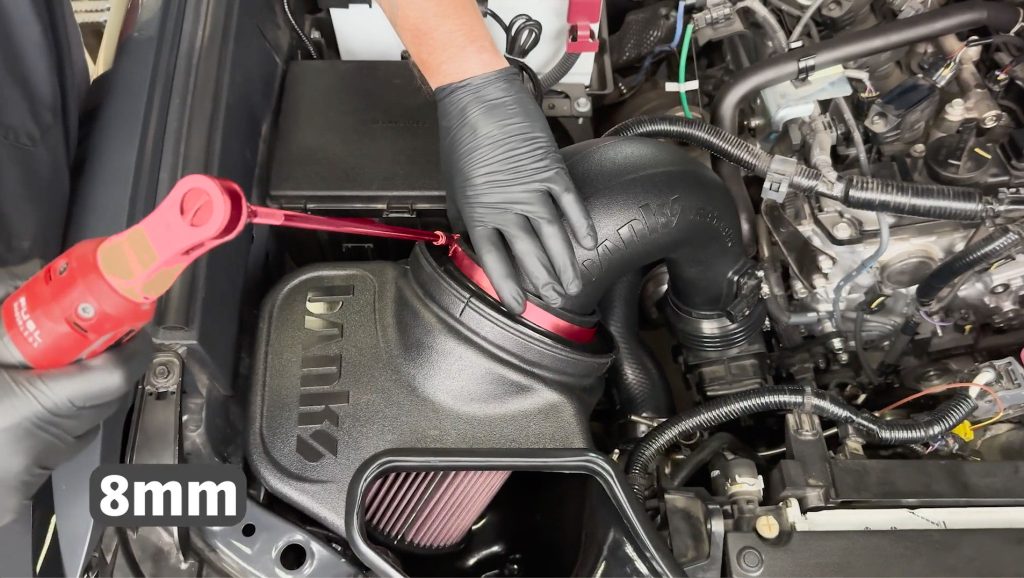
12. With an 8mm socket or flathead screwdriver, tighten the filter to the tube.
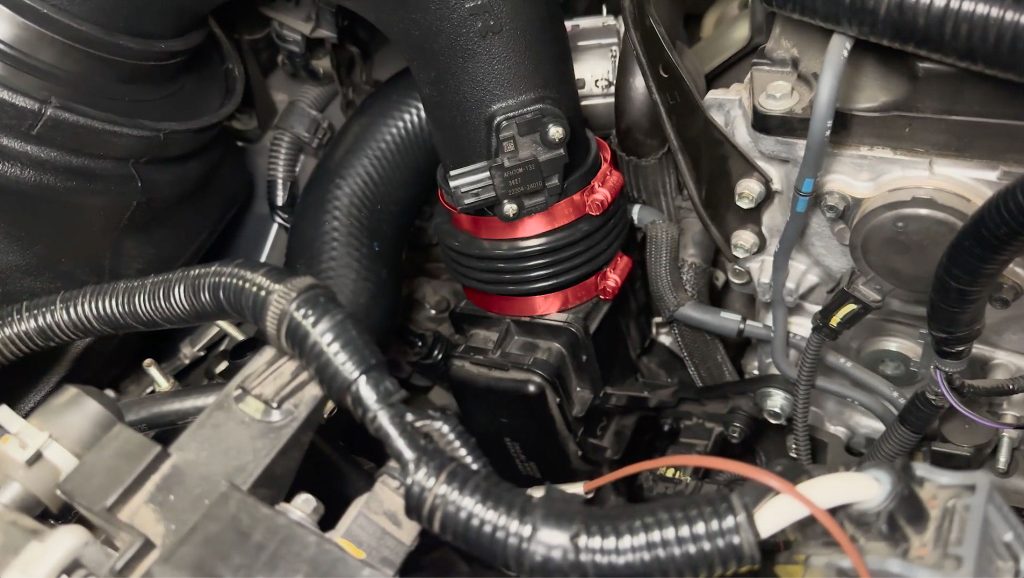
13. Tighten the two lower hose clamps.
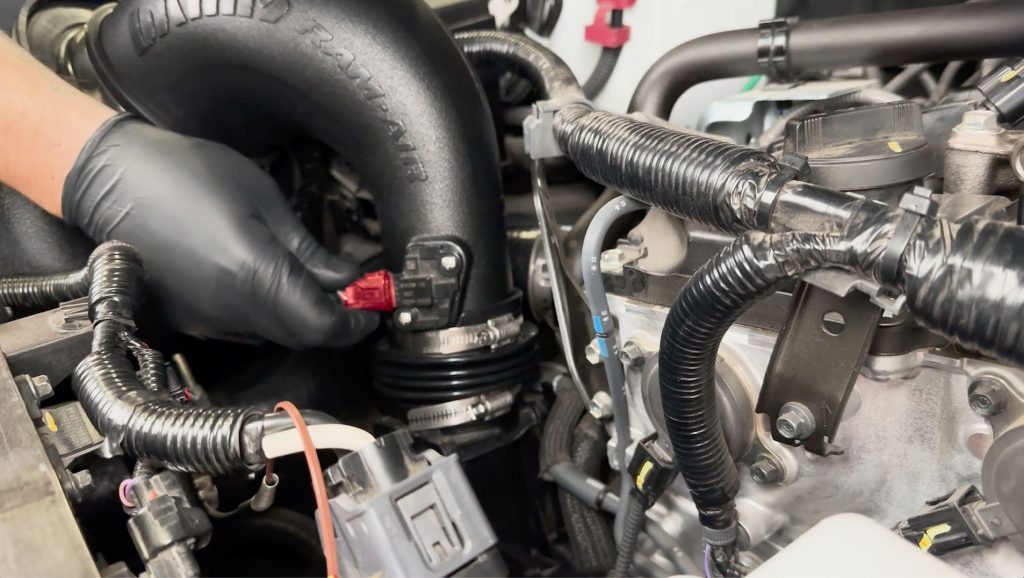
14. Plug the Mass Air Flow sensor back in.
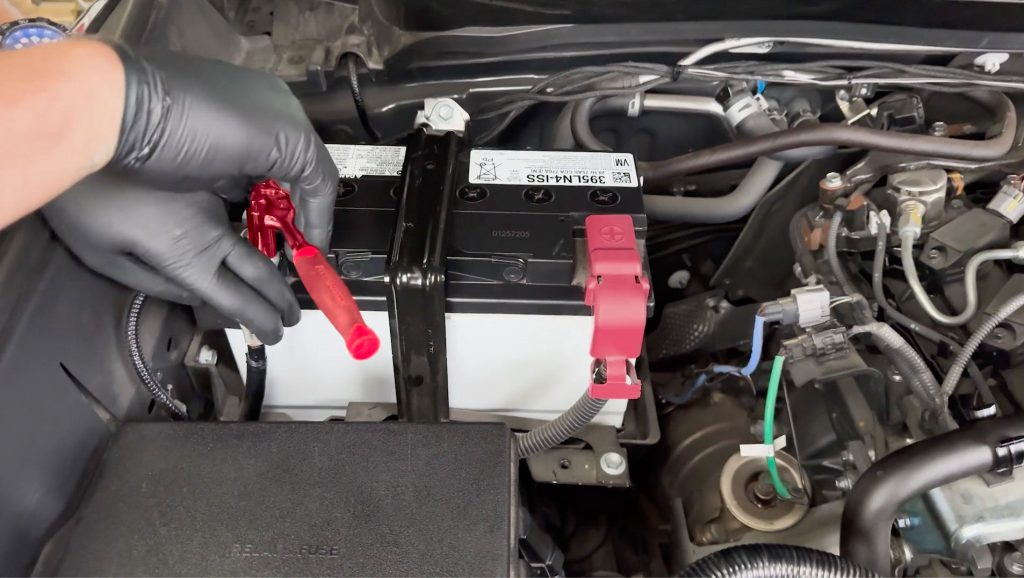
15. Reinstall the negative battery terminal.
Banks Cold Side Installation
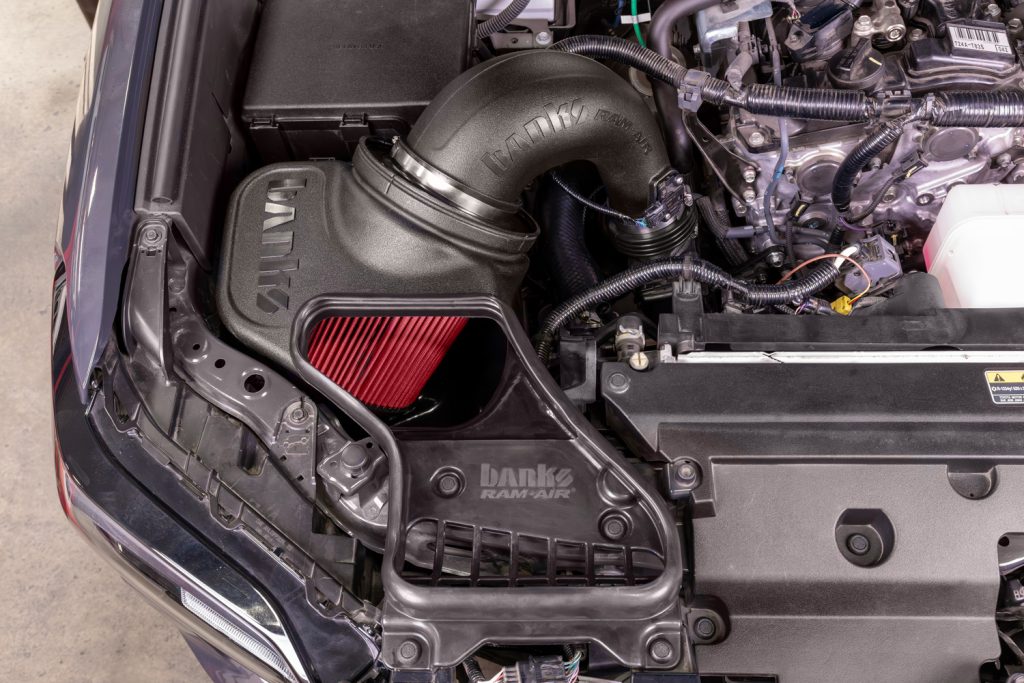
Check for any loose connections, hoses, clamps, or sensors. And enjoy your new Banks Ram-Air intake.